Showing posts with label party makeup. Show all posts

Friday, September 11, 2015

How to apply eye makeup for every eye shape

Eye makeup for every eye shape (Picture Courtesy : weheartit)
Eye makeup is a very important part of the entire face makeup. Eye makeup if done properly can make our eyes look bigger, brighter and awake. Another thing which we need to take a note of is that, we have different shapes of eyes. So in order to do our eye makeup perfect, we need to determine our eye shapes and accordingly apply eye makeup according to the eye shapes.

So, in this article, we shall give you the techniques to apply proper eye makeup based on eye shape.
Eye makeup for round eyes (Picture Courtesy : makeupgeek)

How to apply eye makeup on round eyes – If you have round eyes, you need to elongate it by lining the upper eyelids with an eyeliner starting from the inner corner till the outer corner, and forming a small cat eye or just extending it a bit outside. Then use a highlighter on the brow bones and inner corner of the eyes. Post that, apply a medium brown eye shadow on the upper lids up to crease, concentrate more on the outer corners of the eyes by packing more colors, and blend it well as you go towards the middle of the eyelids. In this way, you will get the desired doe-eye look.
Eye makeup for downturned eyes (Picture Courtesy : primped)

How to apply eye makeup on downturned eyes – Downturned eyes need a bit of lift, so the eyeliner will help you the most in this case. Just apply the eye shadow as a person with round eyes would. But the eyeliner should be thicker than the women of other eye shapes would apply it. So start from the inner corners of the eyes, up to the outer corners and at the end, flick it upwards into a smiley shape or cat eyes.
Eye makeup for deep-set eyes (Picture Courtesy : stylebistro)

How to apply makeup on deep set eyes – The only tip for makeup on this shape of eyes is that, if you apply dark eye shadows, do it very gently. Just highlight the areas of the eyes you would love to accentuate and give an illusion of round eyes. Dont let the dark eye shadows overpower the entire eye makeup.
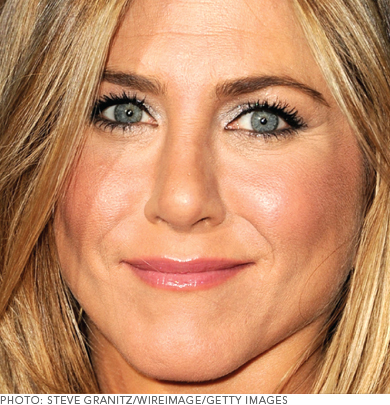
Eye makeup for close-set eyes

How to apply makeup on close set eyes – For close-set eyes, we want to make them wider. So basically go for three eye shadows, first the highlighter which you sweep across your browbones and inner corners of the eyes. Then, a medium brown eye shadow which you apply on the eyelids from the middle part to the end, extend it a bit outwards. And while packing the color on the eyelids apply it in a round way. And finally to create more contrast, use a dark brown eye shadow on the crease. Then take the eyeliner, and start lining from the middle part of your eyelids and extend it beyond the outer part of your eyes in a straight line.
Eye makeup for protruding eyes (Picture Courtesy : popsugar)

How to apply eye makeup on protruding eyes – If you have protruding eyes, don’t use any highlighter on the inner corners of the eyes or the waterline. However, below the browbone apply some highlighter. Apply eyeliner very thickly from the inner corner to the outer corner and extend it in a straight line. The dark eyeliner on the lids will downplay the protruding shape of the eyes.
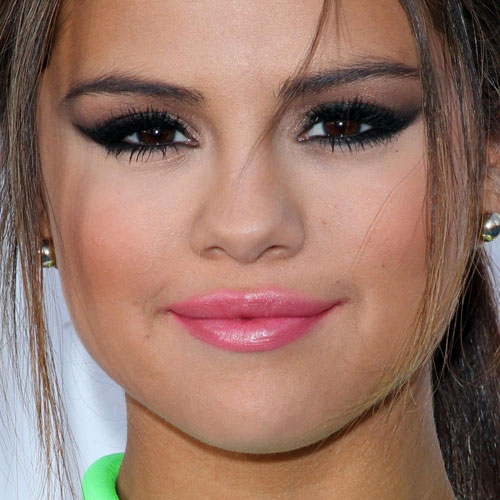
Eye makeup for hooded eyes (Picture Courtesy : stealherstyle)

How to apply eye makeup on hooded eyes – Hooded eyes have an extra layer of skin just underneath the brows, that just hides the crease areas and makes the eye lids look smaller. You don’t need much highlighter in this case, just apply a tiny bit on the inner corners. Next apply a medium colored shadow on the eyelids, and pack the dark eye shadow on the crease as well as on the outer V subtly. Apply the eyeliner on the eyelids, not in a thick way, and extend it out with a flick.
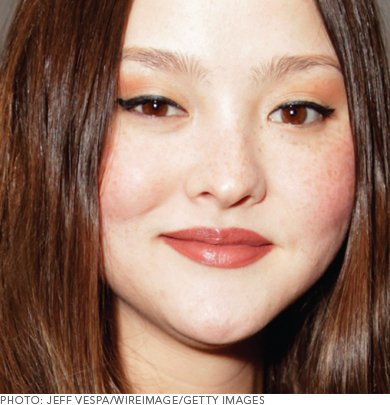
Eye makeup for monolid eyes

How to apply eye makeup on monolid eyes – A monolid eye does not have any crease. So, you need to apply makeup to this eye shape in such a way, that it makes the eyes look bigger and wider and open. Highlight the inner corners by using a white shimmery shadow and take it up to the centre of the eyes. Then take the next medium color and apply it from the crease to the outer corner of the eyes. Just create a round shape. Now define the same shape that you just created with the medium color, using a dark eye shadow. For the eyeliner, draw a very thin line which gets a bit thicker as it goes outside.
Eye makeup for almond eyes (Picture Courtesy : taaz)

How to apply eye makeup on almond eyes – Almond eye shape is the ideal eye shape. Its the most symmetrical eye shape. So half of your task is already accomplished by its own, as you don’t need to create the illusion of symmetry with makeup. So, for this type of eye shape, you can use eye shadow and eyeliner as you want. Just step back from the mirror and keep checking if things are upto your likings.


So, thats all about the eye makeup for different shape of eyes. If you follow the steps mentioned in this post, you can definitely achieve the perfect eye makeup and look gorgeous! Good luck!

Copyright © aEsThEtIcS

Thursday, September 3, 2015

Makeup for college students

Picture Courtesy : trusper
You are a teenager still if you are in college or probably you just have hit early 20s. Whatever be the number, you know you are youthful and having a fun time in your life. But this is the stage when you are not quite sure of what will look good on you. You may spend hours thinking about ‘how should i apply my makeup?’, ‘what makeup products should i use?’ etc. This article will provide you some helpful tips to do your makeup right as this particular blog-post is dedicated to college student makeup. So, don’t be stressed and don’t worry much, we have your questions covered!

Picture Courtesy : dreamstime
Skincare for college students – Before you jump in to makeup, taking good care of your skin is extremely important. You can get away from blemishes and acne if your skincare routine is good enough.
Picture Courtesy : 123RF

·         Now, before application of makeup, its always necessary to start by washing your face well. If your skin is dry, go for mild cleansers, even cream cleansers will work. If your skin is quite oily, use a cleanser which has salicylic acid.
·         Next comes moisturizing your face which will hydrate the skin and prep the skin. If your skin is dry, go for heavy or intense moisturizers. If your skin is oily, choose an oil-free moisturizer.
·         Finally, don’t forget to wear sunscreen with at least SPF 30. If you don’t like piling too many products on your face, go for a tinted moisturizer which has SPF in it.

Makeup Base for college students –
Picture Courtesy : wikisingapore

·         Foundations have a tendency to make one look older and the skin look cakey at times. So its best to skip foundation when you are doing makeup for college. You should look natural and accentuate your natural beauty.
·         However, concealer is a must-have. As an adolescent, you might have dark circles and acne scars or blemishes. Take a concealer which matches your complexion or just 1 shade lighter than your skintone. Just dab it on the spots which need to be covered up and gently blend it with finger. Dont wipe it! After that, put a bit of face powder over the spots so that its set. Its better to use a yellow tone concealer under your eyes, if you want to brighten the eye area. Dont go for concealers which are too pink or white or ash in color.
·         You can always use a tinted moisturizer as a base on your face instead of using foundation. However, its okay if you want some heavy makeup at times and then you can definitely go for foundation. Choose a foundation shade which matches your complexion exactly. Take a foundation brush and put the foundation on it and draw 6 lines all over your face, starting from nose all the way up to the forehead, then nose to your right and left cheeks, nose to chin and then nose to both sides of your jaws. Use the brush to blend everything well, and put some foundation on the neck too, so that the color all throughout your face and neck matches. You can also use a sponge or beauty blender to blend everything well.
·         Powdering the face is not required unless you have oily skin. Since you are already young, you will have a natural glow on your face and the face powder will kind of cover it up. So, you can brush powder on the spots where you have used concealers and also on the T-zone i.e. your forehead, nose and chin. This will help to absorb excessive oil keeping the glow intact.

Eye Makeup for college goers –
Picture Courtesy : featurepics

·         Start by brushing your eyebrows upwards and not inwards. You can use an eyebrow brush or a toothbrush for this. Keep your brows neat and well groomed. Dont pluck the brow hair excessively.
·         For the eye shadow, go for a natural shimmery eye shadow. Apply it up to the crease, not on the brow bone. You can also apply some of it on the lower eyelids. If you have brown or hazel eyes, go for warm eye shadow colors like copper or gold hues. You can also wear some fun colors like blue or green if its night time.
·         I wont recommend a black eyeliner for a college student, unless its a special occasion. For everyday makeup, go for purple or brown eyeliners. If your eyes are small, avoid dark eyeliners. Also for a young college student, keep the eyeliner application on the upper eyelids thin as close to the lashes as possible. Too much of eyeliner can make one look like a raccoon.
·         For mascara, you can either go for brown or black mascara. Just wiggle out the mascara wand as you apply mascara on the lashes. Dont apply a lot of the product as it will result in clumpy eyelashes.

Picture Courtesy : depositphotos
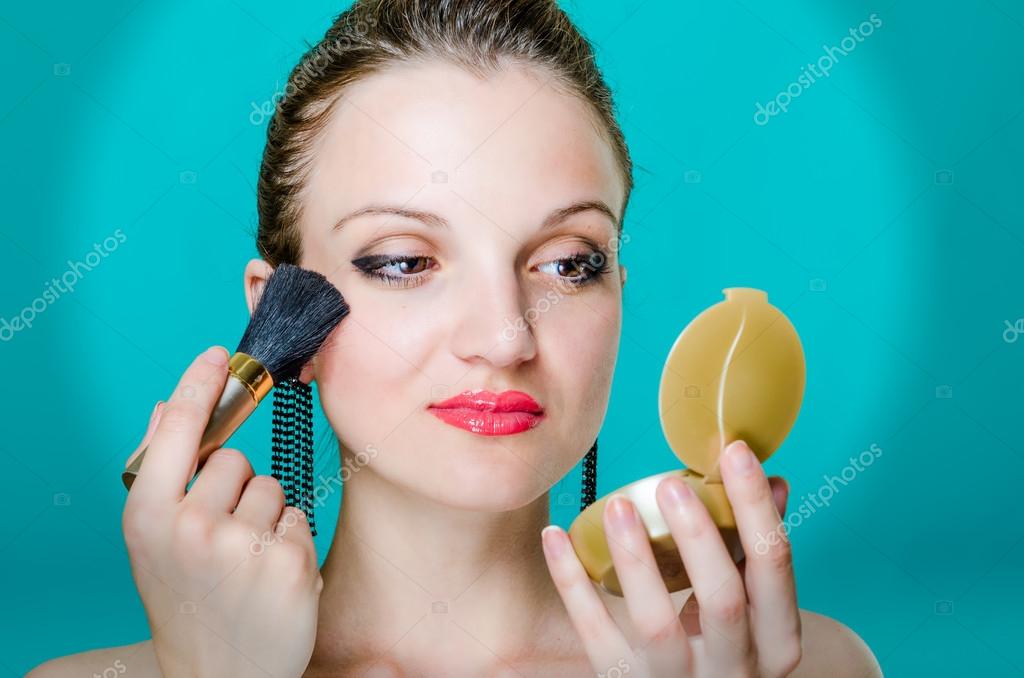
Blush for college students’ makeup – You just need to add a bit of color on your cheeks without overdoing it. So keep the blush color natural. Dont opt for too dark or intense blush colors. Pink rosy blush or bronzers are ideal for college girls. And to apply the blush, just smile, and apply the blush on the apples of your cheeks. Some people even add blush on their foreheads, chins and noses, but i personally never did that, however you may try.

Picture Courtesy : alamy
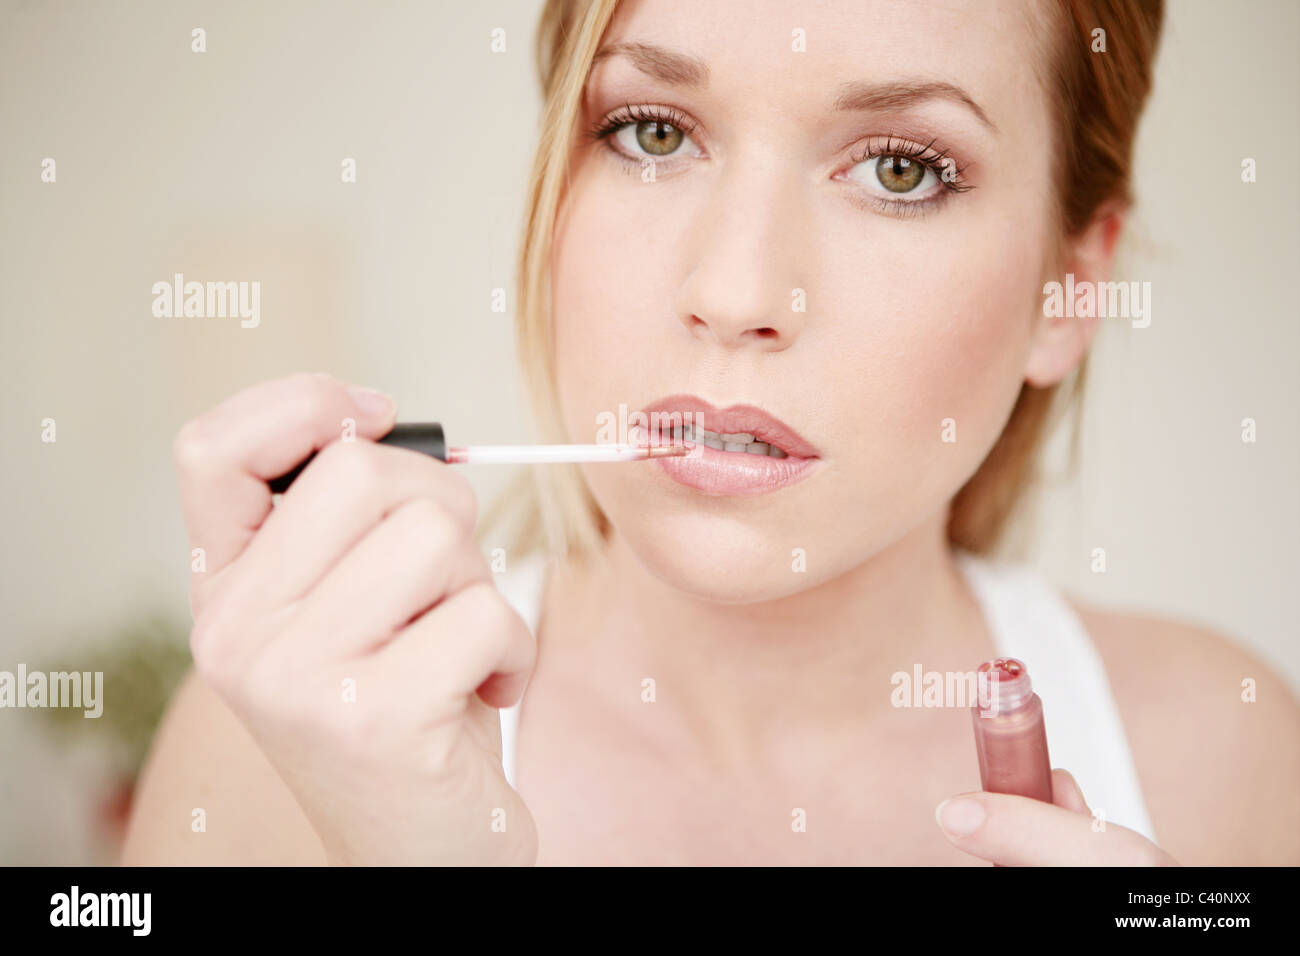
Lips for college girls’ makeup – Instead of using a lipstick, go for more natural makeup products like a lipgloss or lip tint. Lip gloss will just enhance your natural lip color adding a bit of shimmer. And lip tint will add a bit of color to the lips. Soft pinks or light browns work well for college going girls. However, do not use dark shades, that will make you look older!

Copyright © aEsThEtIcS

Tuesday, July 28, 2015

How to do basic stage makeup

Picture Courtesy : newtomakeupeffects
If you are a stage performer, dancer or theatre actor, stage makeup is absolutely essential. Stage makeup is definitely heavier than the normal makeup we usually do, but then it would be lighter than drag makeup still. This kind of stage makeup needs to be heavily done, so that you can be seen from a distance, people sitting at the extreme corner opposite to the stage too can see you. Also stage lights are very harsh and can wash out any bright pigments if not applied heavily.

You need to create harsh lines and overdraw contours in stage makeup or theatrical makeup. Never go for soft blended makeup look. You need to create just the opposite of it.

CTM – Since you will be applying a lot of heavy makeup and various colors, make sure to prep the skin well first. Cleanse the face and neck with a mild face wash and pat it dry. After that use any good quality toner. Moisturising is absolutely unnecessary for oily skinned or combination skinned people, however if your skin is very dry then go for an oil free moisturiser. We need to keep the face absolutely shine free.

Foundation – Opt for a heavy coverage foundation, and choose it at least 2 shades darker than your natural complexion so that you don’t look pale when the lights are on you. Cream foundation is the best for stage makeup.

Picture Courtesy : Health.howstuffworks
Highlighting & Contouring – Choose a cream based highlighter and a bronzer. A very light concealer or a white creamy shadow can act as the highlighter. And any dark brown cream shadow can be used to contour the face. Areas on your face that recede should be contoured, like the hollows of the cheeks, sides of your forehead, and a sweep of the bronzer from the ears to the chin covering jawbones. Also contour the sides of your nose. You need not blend it at all.

Also do not forget to highlight the cheeks, center of your brows, top of the nose and chin. Also you can highlight the centre of your lips and the inner corners of your eyes. Do not forget to set everything up using a translucent powder.

Blush – Apply blush with a heavy hand. Make sure to use blush colors like red, orange, fuschia, on the apples of the cheeks going towards the temples.

Picture Courtesy : lasleycentre
Eyes – Eyeshadow should be applied on the upper eye lids only and not on the lower lids. We don’t need to create any unnecessary shadow underneath the eyes, unless the character demands so. Also outline the brows with a black or brown eyebrow pencil and set that off with a similar shade eyebrow powder. Put some white highlighter on the browbones. Also you can apply white matte eye pencil on the waterline to get a more dramatic eye makeup. Its best to use eyeshadows of brown, nude, tan or light pink shades. The makeup wont be complete without mascara and false eye lashes.

Picture Courtesy : bebeauties blogspot
Lips – Overdrawing the lips is a must for stage or theatrical makeup. Start by lining your lips using a lipliner in orange, red or fuschia. Blend it with a lip brush and then apply lipstick of the same color on top of it. To highlight the centre of lips apply white highlighter or any light reflective shadow. In order to get a matte finish and prevent lipstick from smearing, put a tissue on the lips and dust some translucent powder over it.

Powder – To complete the stage makeup, you need to powder any exposed areas like face, neck, ears. This will prevent makeup from melting down. This will always keep the shine at bay and present uniform color to the exposed areas.


Picture Courtesy : thinkstockphotos
When you are done, it should appear that you went overboard with the colors and might appear funny and weird with so much of makeup. But then i told you before stage makeup is so very different from the usual beauty makeup. So don’t be bothered, and get on the stage and rock the audience!

Copyright © aEsTheTiCs

Thursday, November 27, 2014

All about holiday makeup

Image Courtesy : popsugar
Holiday parties are fun always. It always allows one to be oneself and mingle with her friends and family and co-workers. In such parties, all are very cheerful and don’t mind any mess up with the arrangement of such a party. However, messing up with holiday makeup is never a good idea. And so here we are, to make you look fabulous during such a holiday party. We are gonna share all the do’s and don’t’s of holiday makeup.

Use shimmer wisely – Shimmery powder and highlighting liquids are there to add a nice healthy glow to your facial skin, so always be subtle with that. If you apply a lot of shimmer, it will make your skin look greasy.  Also with that kind of makeup, you would never like the way you look in pictures especially taken with flash. Add highlighter to cheekbones, eyelids and also on the brow bones.

Go easy with your winged eyeliner – Classic winged eyeliner is always a safe try, it generally never looks bad with most of the makeup looks. However, avoid over-extension of winged eyeliner. The wing should be drawn neat and clean and just extend the wings a bit beyond the lash line. Use an angled eyeliner brush and a cake eyeliner or a liquid liner to apply the liner easily and achieve the flick properly.
Image Courtesy : pinterest

Avoid heavy false eyelashes – Go for false lashes or individual eye lashes which will blend naturally with the lash line and wont look dramatic, but add to the volume. Also use a good volumnizing mascara. Wiggle the wand at the bottom of lashline and move the wand up slowly.

Try out pretty lip color – Skip the regular nude lip colors you generally use, and go for some colorful pretty lip color but don’t go overboard with it. If you are donning on a bold lip color, use subtle eye makeup.


Don’t forget your arms and legs – Apply moisturizer or body oil to hydrate the skin and add a nice sheen. If you want a bit of highlight on the skin, add a bit of highlighter or illuminator on the body lotion, and apply it on the exposed areas of the skin.

Copyright © aEsThEtIcS

Wednesday, October 9, 2013

Beauty tips for Navratri special garba

Picture Courtesy : samanansari
If you want to look flawless and beautiful this navratri, look no further as you have landed on the right page. I am gonna write some tips so that you can look beautiful this navratri, if you follow these tips strictly.

Haircare for garba – If you feel your hair is dull and lusterless, go for a hair mask that you can make at home and apply it all by yourself. So before you shampoo your hair, you can apply a quite helpful mask for your hair and see the difference after you have cleansed the hair properly. Take a teaspoonful of vinegar and a bit of almond oil. If you don’t have almond oil, 1 egg would also do. Mix these stuffs and then massage this mixture on the hair. Wrap your hair with a hot towel and leave it for 30 minutes.

If you have frizzy and bushy hair, take a cream hair conditioner in a spray bottle by adding some water in it. Whenever you are set to go out, spray it on your hair and then comb the hair well.

Hairstyles for garba –

·       If your hair is long, go for wavy and curly style of hair. Create big natural waves on the lower part of the hair, it looks really feminine and charming.

·       Side-swept fringe hairstyle is also very IN. However, if you are wearing maang tika, then part your hair in the centre. For long and large or oval face shapes, layered fringe looks the best.

·       If you love ponytails and side braids then go for it. Add some embellished hair clips and ribbons, that looks super cute!

Skincare for garba –

Picture Courtesy : martofimages
Toning the skin : Take some rose water and dip cotton balls in it. Let the cotton balls soak in it for quite sometime and keep the bowl in the refrigerator. After 20 minutes, take out the bowl, and with the soaked cotton balls, wipe your face. Use an outwardly upward stroke while you wipe your cheeks. Be gentle. Afterwards, pat dry your face with a soft napkin.

Scrubbing : You can make homemade scrubs and use it on your face and exposed areas of the body, this really makes the skin bright by removing the dead skin cells.

If you want a peel scrub, take yogurt and grounded almonds. Add to it, dried and powdered peels of lemon and oranges. You can also use dried mint leaves. Apply this mixture and leave it on your face for few minutes. Using circular movements you can rub the face gently. Then wash it off with water.

For walnut scrub, use walnut powder, lemon juice and honey to make a paste. Apply it on the face, let it dry. Rub it gently and then rinse it off with water.

Facial masks : You can try out different facial masks in order to get a glowing skin. Here I have mentioned about 2 facial masks that can be made at home, and is really very helpful for skin.

Fruit facial pack can be made with mashed up bananas, sliced and grated apples, pulp of ripe papaya. Add in yogurt or lemon juice in this mixture. Make a paste with all these and apply on the face. Keep it for 20 minutes and then rinse it off.

Take ½ tablespoonful of honey, and mix it with 1 tablespoonful of milk powder and 1 tablespoonful of rose water to make the rose water pack. Apply this mixture and keep it for 20 to 30 minutes. If you have oily skin, instead of milk powder use multani mitti. After you apply this mixture, you can take 2 cotton balls dipped in rose water and place them on eyes and take a short nap. After 30 minutes, you will get glowing and refreshed looking skin.
Copyright © aEsThEtIcS

Sunday, September 29, 2013

Be outrageous with poptastic collection of L'oreal Paris India

L'Oréal Paris goes outrageously POP and launches the Poptastic collection for a touch of flamboyant color, new from Paris!

What makes the POPTASTIC collection so awesome?
It’s outrageously colorful, it’s outrageously POP. Rock your beauty must haves for this season with glamorous hot shades from the latest Poptastic Collection by L'Oréal Paris. This collection is the perfect way to completely jazz up your beauty wardrobe. L'Oréal Paris introduces a set of products that will add that extra element of oomph with fun colors and exciting prints so you can live life on the brighter side!
The Poptastic collection has something for everyone. Indulge in the latest shades from the Color Riche Le Vernis for your nails, Glamshine Balmy Gloss for a luscious pout and the Color Riche Eye Pallette to add that extra sparkle to your eyes! With happy hues like pinks, corals, blues and tangerine, you can go bold and funky by sporting a new bright look every day.
Be poptastic, you are worth it! :D
Image and information obtained from L'oreal Paris India
Copyright © aEsThEtIcS

Thursday, August 1, 2013

How to apply shimmer powder or highlighter

Image Courtesy - tattoopins
Shimmer powder can make or break the final makeup look. So, ladies be careful while using it. If not used properly, shimmery powder can have disastrous effect. This powder can add a healthy glow to the facial skin instantly and also enhance the entire look. So, if you want to know how to apply shimmer powder then read on this article.

Any part of your body can be highlighted using this highlighter or shimmer powder. However, if applied on the face properly, you can achieve the perfect evening party look instantly with the help of highlighter. Be it frosty eye shadows or shimmery rouges, or just a highlighter, anything of these sorts can help you look glam in a minute! You just need a bit of highlighting on the temples, bridge of the nose, chin et al.

Choosing the right highlighter/shimmer powder – Well, if you are dark or tanned, go for bronzy or golden shimmer powder. For very fair skinned ladies, silver shimmer powder would be great. Warm pink highlighters work well on all skin tones.

Image Courtesy - bridesparkle
Face accentuation – You need a fluffy makeup brush to apply shimmer powder or highlighter. Gently sweep the brush loaded with the powder over forehead, cheeks, chin, nose. At times shimmery powders may look a bit harsh on the face, so in that case you can use a shimmery blush, or shimmery eye shadow to accentuate the face.

Body highlighting – Before you wear the outfit, you must apply the highlighter. Otherwise the shimmery powder may get sprinkled over the costly outfit and spoil the dress. You may apply the powder in the middle of the cleavage, arms, legs, collar bones. Do not apply any other sticky cream or moisturizer as that might mess up the look.

Shimmer for the tresses – In order to brighten up the hair-do, you can apply highlighter. Put a bit of it on a brush and tap it only once or maximum twice over your head. Remember, too much of shimmer can spoil the look instantly. Make sure your hair is dry before applying the shimmer. If you have already used any styling cream or gel, then do not go for shimmer powder.
Copyright © aEsThEtIcS

Friday, December 28, 2012

New Year Special Beauty Treats!

Picture Courtesy : makeupgourmet
Just after 2 days, 2012 will end and a new year 2013 will begin. So why not welcome this new year by indulging in some special beauty treats for yourself? Pamper yourself at the beginning of the new year with a variety of treatments.

·         Body Polishing : In order to look fabulous all throughout the new year, you need to take care of your skin. Have you tried body polishing? This starts off with scrubbing to exfoliate the skin, then a body massage is given, and finally a body pack is applied. At the end of the session, you get a healthy glowing skin. If you have uneven skin tan, go for body polishing once a week. Though this session takes a bit of time, but the end results are not disappointing!

·         Hair Protein Treatment : If you have protein ampoule at home, you can do this by yourself at home too. Shampoo the hair, and apply the protein ampoule on hair, skip the conditioner. Wait for 10 to 15 minutes and then wash it off. You can do this treatment once or twice a week.
Picture Courtesy : jotzoom

·         High Gloss Hair Treatment : A specialised serum and cream made for this particular purpose can give your hair a glossy and healthy shine. The treatment also includes shampooing the hair and mild conditioning. After the completion of the treatment, blow dry the hair or use styling products, and your hair is super ready to complement your gorgeous looks. However the effect is not long lasting, and comes off with the next wash. This treatment is particularly helpful for girls who have got colored or highlighted mane.

·         Brazilian Blow Dry : In this treatment, the hair is coated with keratin which makes the tresses tangle and frizz free and also smooth. This treatment will certainly help one to style the hair according to one’s wishes. But depending on the type of hair, this treatment will last for 2 to 3 months. However you must be careful and avoid any such formulae which contain formaldehyde.

Copyright © aEsThEtIcS
Shop 2b for Affordable, Fun & Flirty Fashion 24/7


Friday, June 15, 2012

REVIEW : MAC CARBON EYESHADOW

RATING – 7 OUT OF 10

MAC Carbon eyeshadow is one of the most hyped eyeshadows in the whole world. Whether you have any other MAC eyeshadows or not, Mac Carbon eyeshadow is on the priority list of all make-up lovers.

MAC eyeshadows are too pricey, but the fact that its generally used by renowned make-up artists and celebrities all over the world, kind of makes it worthy of such a price. So I got a refill pan of MAC carbon eyeshadow consisting of 1.5 gm of the product. MAC eyeshadow refill pans cost approximately INR Rs 700 each in India.

MAC claims : Highly pigmented powder. Applies evenly, blends well.

MAC Carbon eyeshadow is jet black eyeshadow, and its matte (YAY!) The lasting power is quite good, just like any other MAC eyeshadows. But alas, its not so pigmented, so I really need a bit more to see the color on the eyes. Also if you apply the eyeshadow over your eyeliner, if you want create a smudgy look, then Carbon makes the entire thing ashy instead of matte black.

MAC carbon eyeshadow can be used as an eyeliner for a smoky effect or you can apply Carbon on the outer corner of your eyes. Remember to use an eyeshadow brush and not your fingers to get the desired results. Two things which I love about MAC carbon eyeshadow is that its matte (in the Indian cosmetic market I find a scarcity of matte eyeshadows) and I got really less fall-out while applying the eyeshadow even though it’s a powdery shadow.

If you want to use your MAC carbon eyeshadow, first apply an eye primer or your concealer for base and then eyeshadows. You will get a better color pay-off and the shadows will blend well.
Copyright © aEsThEtIcS
MATTE EYESHADOWS AT $28


Wednesday, August 3, 2011

NARS SOUTH PACIFIC EYESHADOW PALETTE

RATINGS – 8 OUT OF 10

Hello girls, hope you are doing fine and looking beautiful. Here’s a review on NARS South Pacific Palette. Well, i think off late, i am suffering from NARS mania. Lol, just a joke!  But you don’t worry, i will be reviewing other brands too. And this is not to promote NARS or any other brands in particular. Anyways, without wasting time let me start. You read on babe!

The South Pacific Palette is having two shades of eyeshadows, one is turquoise and the other aqua-marine color. The silvery blue color is having shimmers in it. Its sheer and a pale blue kind of color. Satin finished, glides on smoothly. The other shade is a sky blue color. Frosty shade. The shade is rich and vibrant, and very smooth to apply.

It lasts really long, but it begins to crease after 5 to 6 hours. Its better if you apply an eyeshadow primer, before the application of the eyeshadow. There’s usually no fall-outs.

Overall the NARS South Pacific palette is fantastic. The combination of a pale and a bright shadows are great. Costs US $ 33, for a pack of 0.14 oz.

Copyright © aEsThEtIcS
NARS FALL 2011 COLLECTION


Friday, May 20, 2011

Loreal Paris HiP STUDIO SECRETS PROFESSIONAL KOHL EYELINER

RATING : 8 OUT OF 10

PHOTO COURTESY-LOREAL PARIS
Loreal Paris Kohl Eyeliner is available in 6 shades. Its priced at just US $ 13. The shades are - Black, Brown, Gold, Burgundy, Teal, Navy.

This eyeliner is not the regular one. A something very different, too awesome, fantabulous! It makes you feel elegant. Well, i bought the one in navy. And i really really loved it.

Firstly, it does not smudge or dry up. Secondly, you can use it as a liner or also as a shadow by just smudging the ends. It has got little sparkles on it. But that wont make you look crazy loony. A very subtle patch of sparkles.

This is a powder eyeliner and thus it does not smudge. But be very careful. You are gonna have a lot of fall-outs, if you are not an expert in this field. So, just remove any excess with cotton ball or Q-tip  and re-apply a little bit of concealer or foundation around your eyes, to set it perfectly.

So, gal you are ready now. Be it day or night, office or party, outline your eyes and look like a diva.

Copyright © aEsThEtIcS


BEAUTY BAR
KAI ROOM LINEN SPRAY

Bond No. 9 New York Swarovski Collection Chinatown Eau de Parfum

(IMAGES AND BANNERS OBTAINED FROM GOOGLE AFFILIATE ACCOUNT)


Saturday, April 23, 2011

NARS NIGHT BREED EYESHADOW

PICTURE COURTESY NARS COSMETICS
NARS NIGHT BREED EYESHADOW is a highly pigmented eyeshadow with lovely sparkles on it. A soft touch of silver on the black eyeshadow makes it look gorgeous and perfect for a fun night out with your boy friend or husband! It blends smoothly. And does not crease, that is the reason it can be used as a long-wear eyeshadow. You can use it as an eyeshadow. Or just take some in a flat eyeshadow brush or eyeliner brush and dip it in water, and then apply near your lash line-it is great as an eyeliner too! You can also use it to fill in your eyebrows.

NARS products are expensive but worth the price! It costs US $ 23 The eyshadow is creamy, thus making it easy to blend. And the best thing is that no fall outs! Though it has got silver sparkles on it, but once you apply on your eyes, you wont be looking glittery. Its more subtle when applied on eyes. Well, it looks somewhat like MAC carbon eyeshadow, except that carbon is not glittery.

CLICK HERE TO GO TO THE NARS WEBSITE
When used with little bit of fix plus on your eyeshadow brush, the color shows up more. Otherwise, its quite subtle. To create a bolder look for the perfect night life, line your lower lash line too with night breed, and see the difference.  
 (NARS BANNER AND IMAGE TAKEN FROM GOOGLE AFFILIATE ACCOUNT)

Copyright © aEsThEtIcS